Easy Web Hosting on Alibaba Cloud – Simple Application Server + HTTPS Setup
Ping Zhou, 2019-07-29
I’ve been thinking about creating a personal website for a while, and finally I put it into action!
There are lots of ways to host a personal website on Alibaba Cloud, just like you will expect from other cloud providers. I picked Simple Application Server which is pretty much a lightweight virtual machine instance with pre-installed configurations (WordPress, Apache, etc). This gives me flexibility of a VM instance, but saves me from the initial setup. A good balance between their Web Hosting and Elastic Computing Service (ECS) in my opinion.
I want the website to support HTTPS because it is more secure and looks more professional. It also helps SEO too. :-)
Setting up basic web hosting is pretty straightforward:
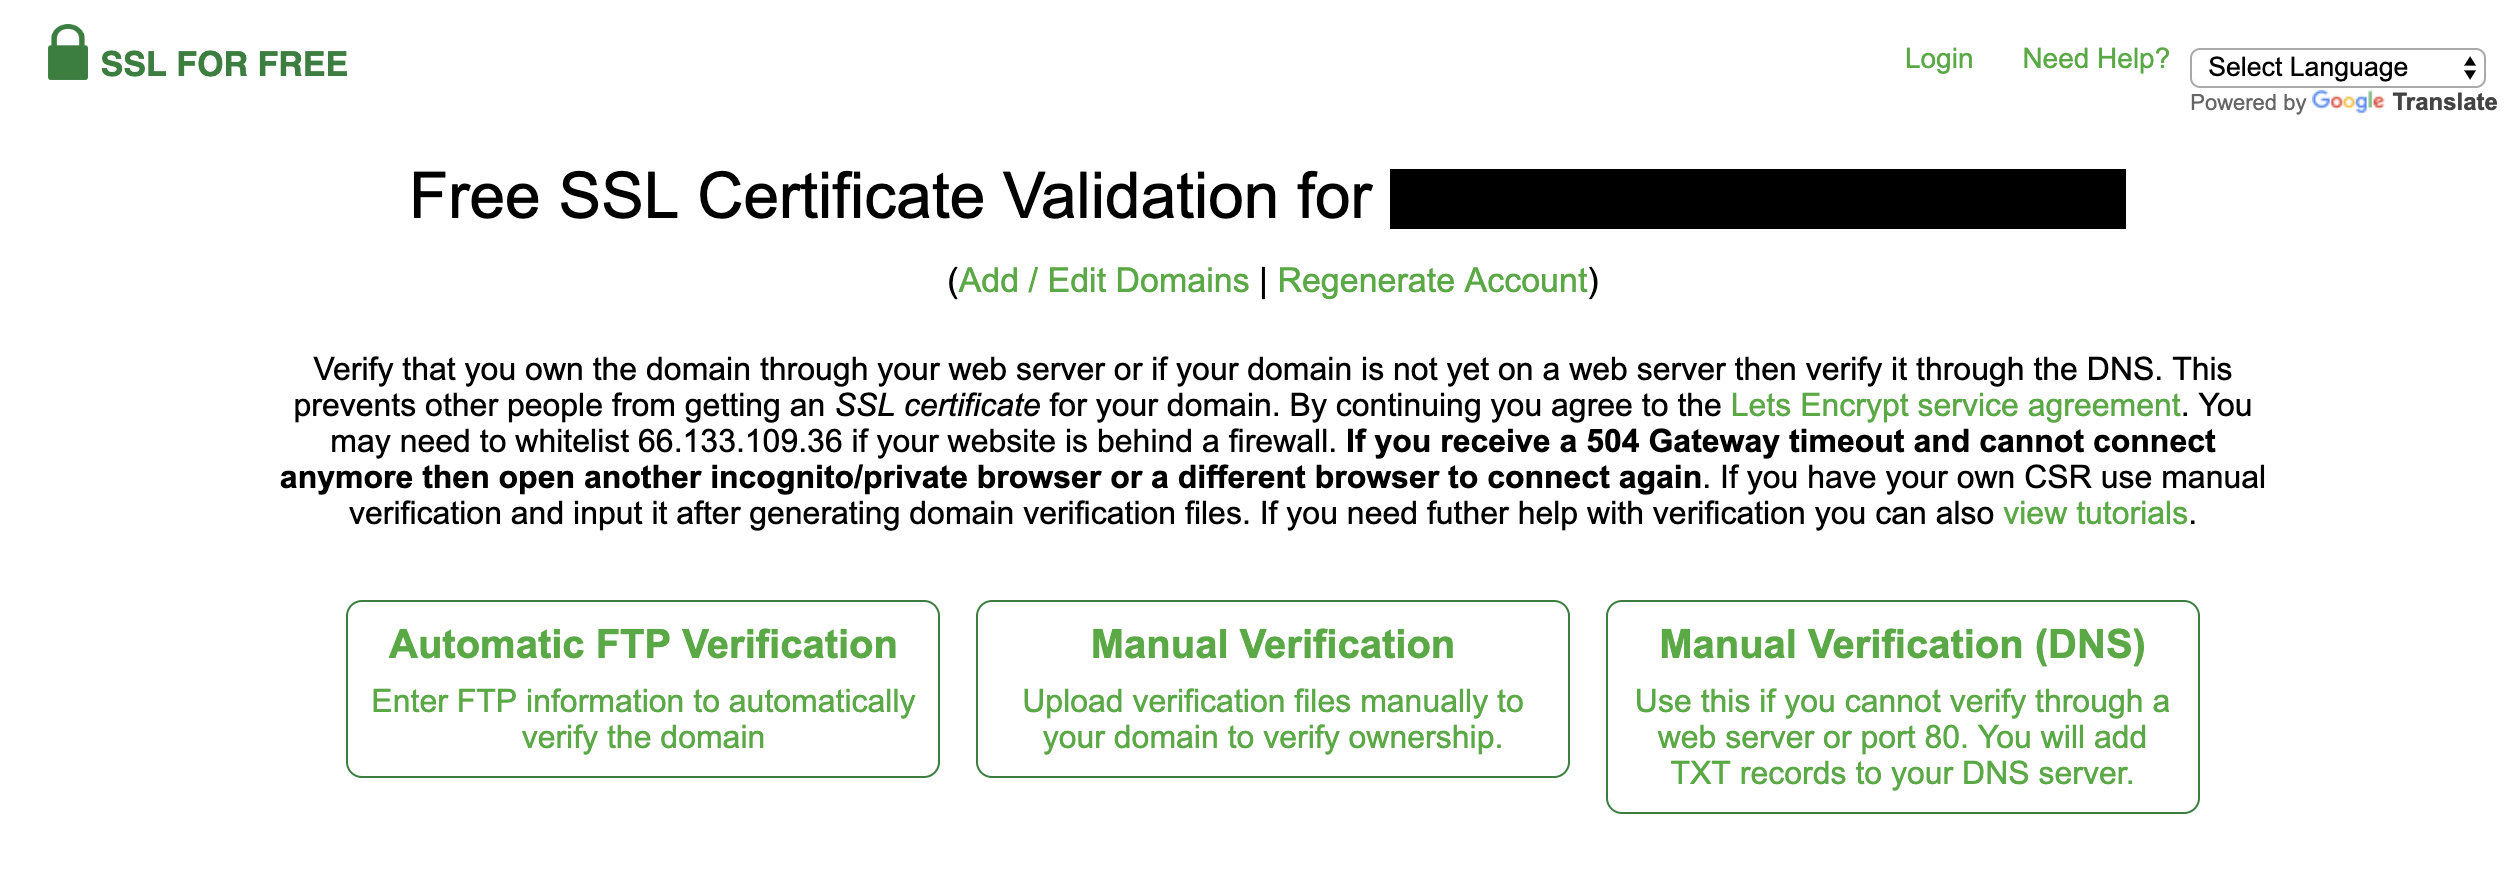
First, you’ll need an Alibaba Cloud account (of course…) Select a configuration for your Simple Application Service instance – I picked WordPress but there are other options as well. Once created, the instance will have the software pre-installed and configured, so you have a good start point instead of having to setup everything from scratch. Setup your WordPress – e.g. create admin user, select theme. Don’t mix this with your Alibaba account – it’s the admin user of your website. You may also consider adding regular users for writing posts etc. Buy a domain name – I bought domain from Alibaba Cloud because it’s convenient. I’m a lazy person.. Bind the domain name to your Simple Application Service instance – again, I used Alibaba Cloud DNS because it’s more convenient. Test out your website – you should see the default welcome page of WordPress. Setting up HTTPS requires a little more work. First, you need SSL certificate associated with your website domain. You can buy it from Alibaba Cloud, but it turned out to be pretty expensive. Fortunately, there are some free SSL certificate services available. I used SSL For Free so I’ll take it as an example:

Generate SSL Certificate for your domain You need to validate your domain in order to generate the certificates – basically, you need to prove that you OWN the domain. There are several ways to prove your ownership.
Automatic FTP Verification: If you are running a VM, you can setup an FTP server on it and enter the FTP account information here. SSL For Free can verify your ownership automatically with FTP. Manual Verification: You need to download two verification files to your local computer, and upload them to your website under folder named “.well-known/acme-challenge”. SSL For Free then tries to access these verification files at URLs like:
http://<your_domain>/.well-known/acme-challenge/<verification_file>
On success, it proves your ownership of the domain. Manual Verification (DNS): You need access to your DNS server, which I don’t have. So I didn’t look at this option. Once you’ve validated your ownership of domain, you’ll be prompted to download the SSL Certificate file generated by SSL For Free.
Note: The certificate is valid for 3 months. So remember to come back and renew your certificates every 3 months.
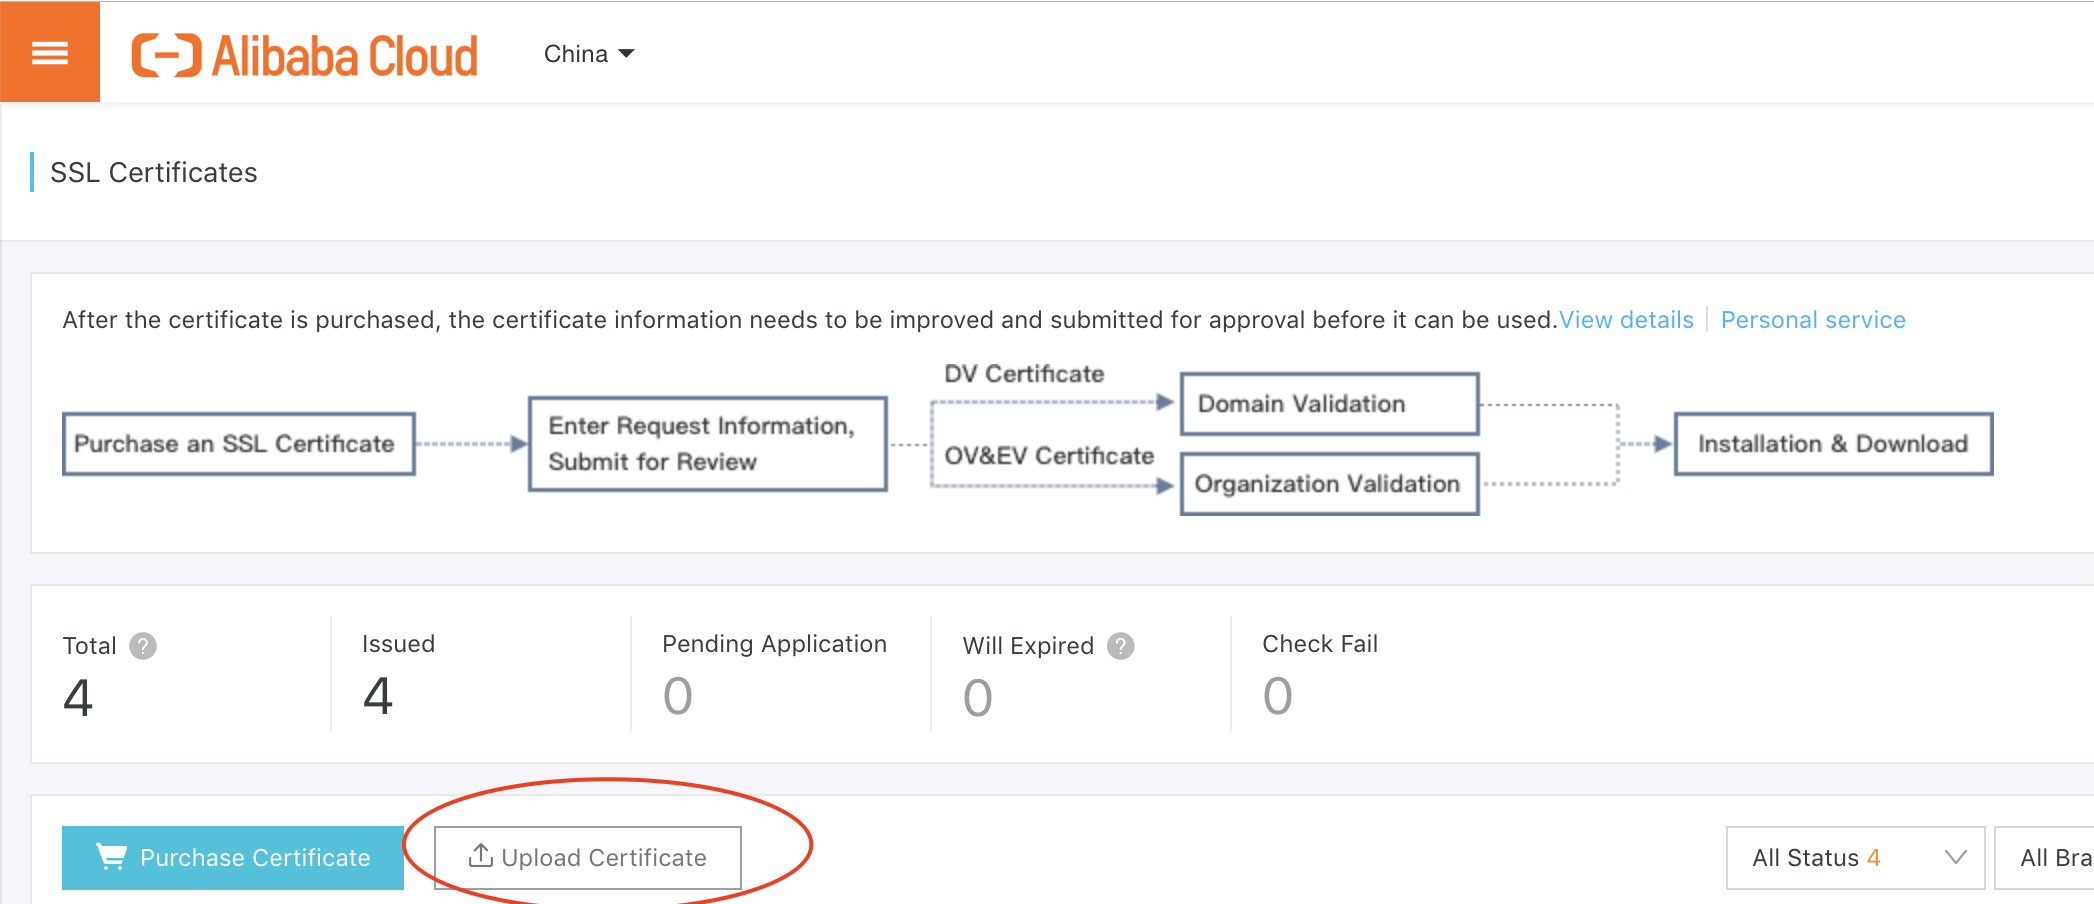
Next step is to upload your SSL Certificate to Alibaba Cloud. This is done in their “SSL Certificates” service:

Upload your certificate to Alibaba SSL Certificates service Once your SSL certificates are uploaded, you may be tempted to click on their “Deploy” links. No, they won’t work for your Simple Application Server instance from here.
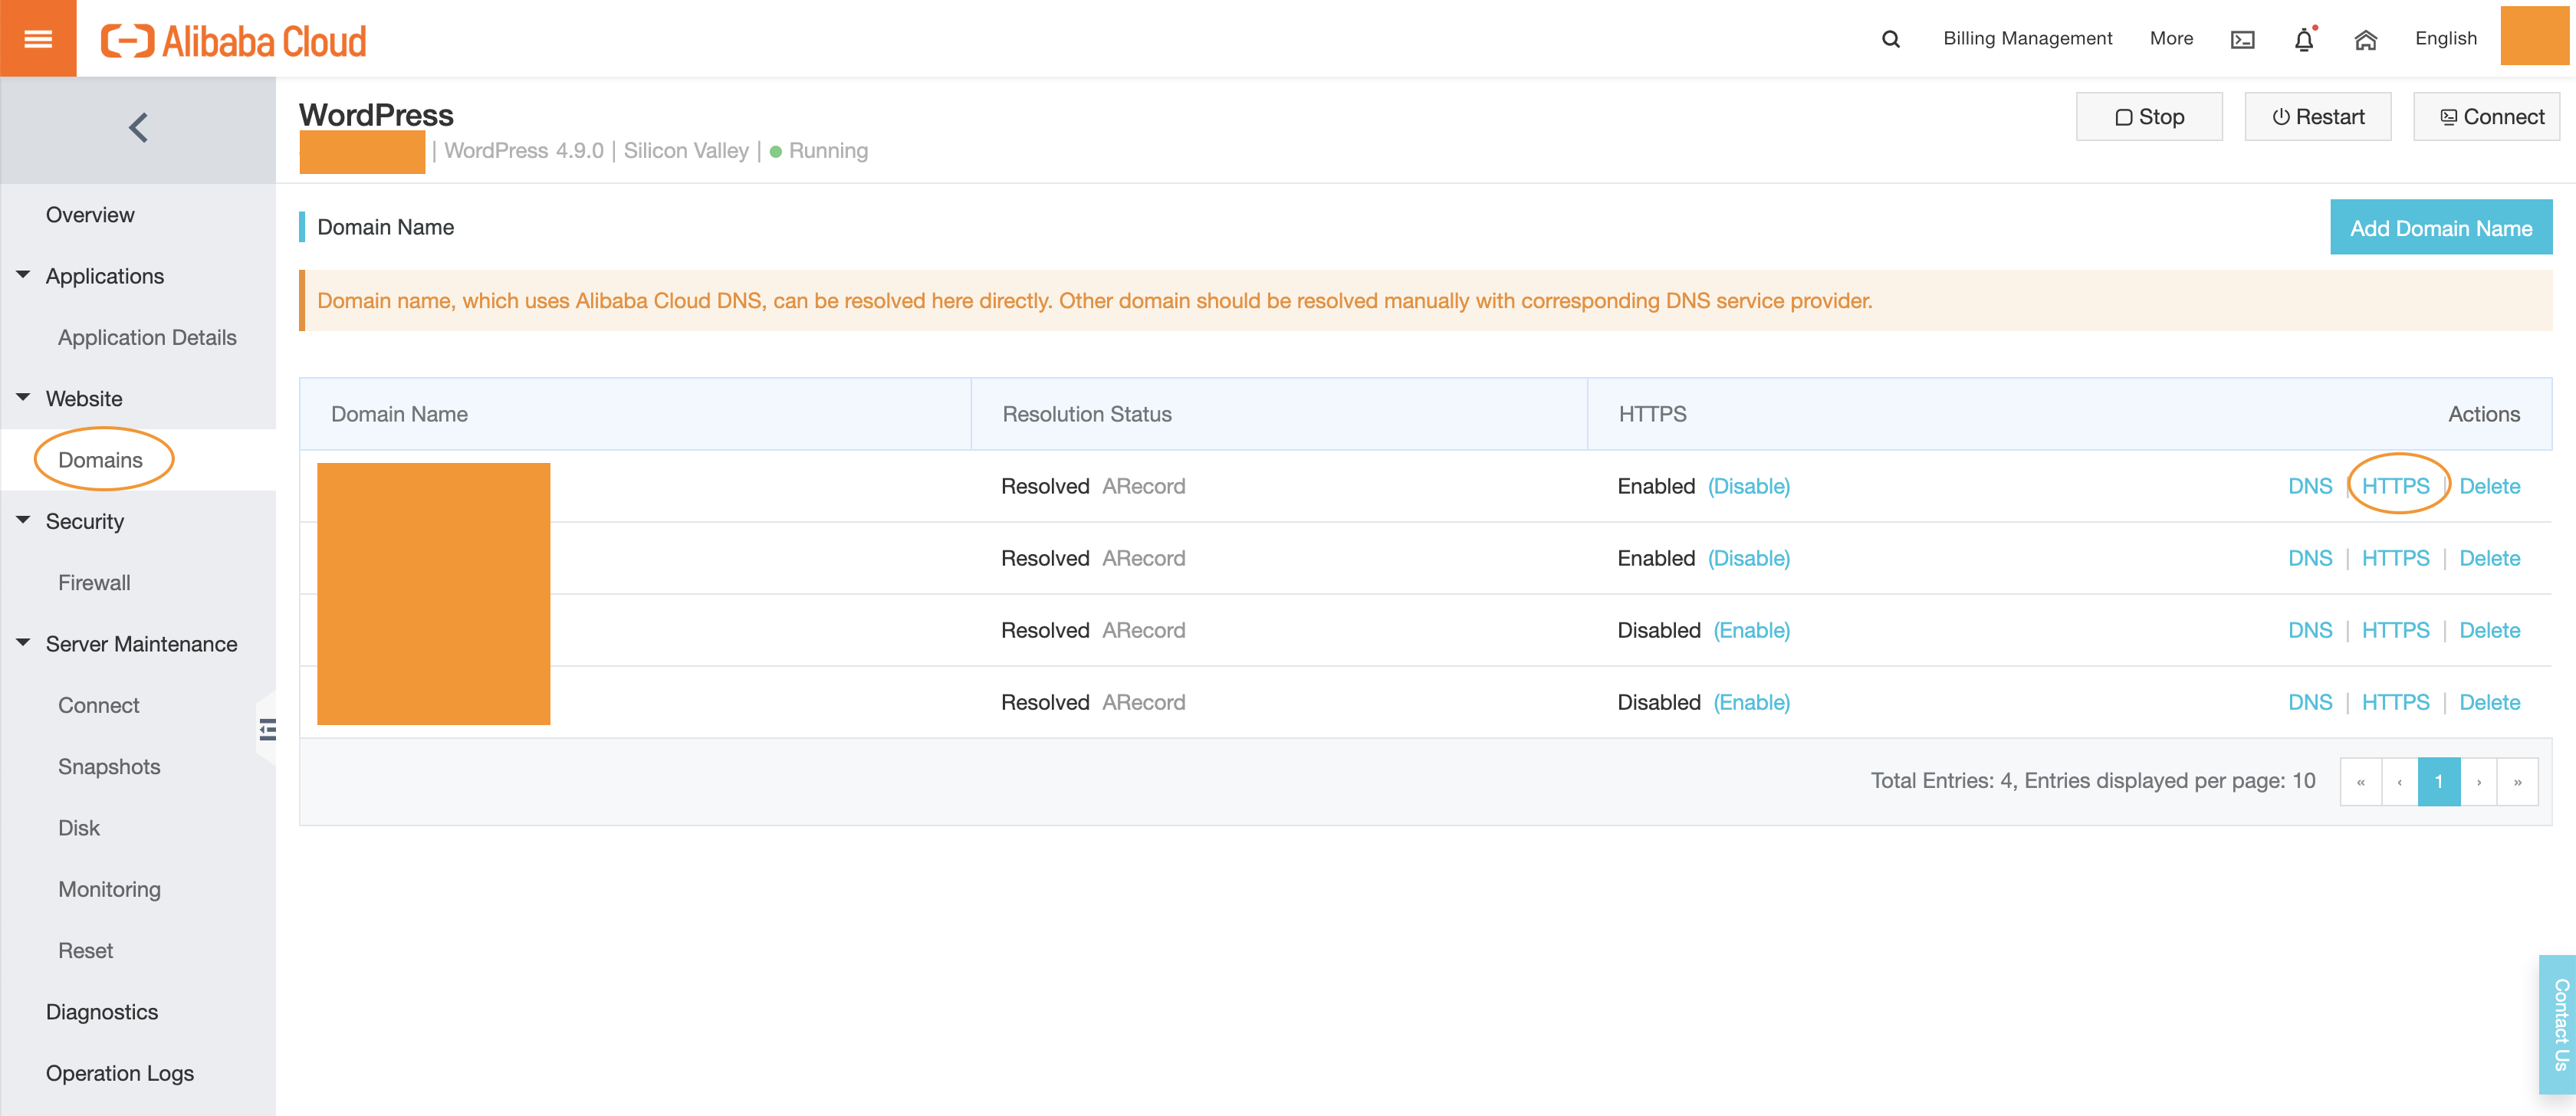
Instead, you should go back to your Simple Application Server console and configure HTTPS there:

HTTPS settings of Simple Application Server instance Click on the “HTTPS” link, and you’ll be able to choose SSL certificate you just uploaded.
That’s pretty much you need to do on the Alibaba Cloud side!
Now the remaining work is to enable HTTPS in your WordPress configuration. Typically you can install one of the SSL plugins to enable HTTPS on your website. For example, I used “Really Simple SSL” plugin. It’s very easy to setup – just install, activate the plugin and test with your browser. You should see the “lock” icon in address bar, showing that it’s using HTTPS.
Congrats, you now have a personal website that supports HTTPS!